
Custom mechanical keyboards have rapidly evolved from a niche hobby into a mainstream trend. Today, a mechanical keyboard kit gives users full control over how their keyboard feels, sounds, and performs, making it a popular choice among gamers, developers, and remote workers.
Unlike prebuilt keyboards, kits allow users to select each component individually—switches, keycaps, stabilizers, and cases—resulting in a fully personalized typing experience.
Industry insights from manufacturers such as Cherry MX show that demand for customizable keyboard components continues to rise, driven by gaming culture, productivity needs, and the shift toward remote work environments.
What Is a Mechanical Keyboard Kit and Why Is It Popular?
A mechanical keyboard kit is a modular package of parts designed for users to build their own keyboard from the ground up or near-complete assembly.
A typical kit includes:
Keyboard case
PCB (printed circuit board)
Plate
Stabilizers
Optional switches and keycaps
The main appeal lies in customization. Users can fine-tune typing feel, sound profile, and performance based on personal preference.
For example:
Gamers often prefer linear switches for fast and smooth input
Writers and programmers may choose tactile switches for better feedback
Enthusiasts focus on sound tuning and build quality optimization
Another advantage is upgrade flexibility. Instead of replacing an entire keyboard, users can upgrade individual parts over time, making the system more cost-efficient and sustainable.
What Components Make Up a Mechanical Keyboard Kit?
Each part of a keyboard kit plays a specific role in overall performance and typing experience.
| Component | Purpose | Notes |
| PCB | Processes key inputs | May support hot-swap or soldered switches |
| Case | Structural housing | Aluminum offers premium durability |
| Plate | Holds switches in position | Impacts stiffness and typing feel |
| Switches | Define keystroke behavior | Linear, tactile, or clicky options |
| Keycaps | Contact surface | Common materials include ABS and PBT |
According to guides such as Keychron’s switch documentation, switch selection alone can dramatically change typing feel, even when all other components remain unchanged.
How to Build a Mechanical Keyboard Kit Step by Step
Assembling a keyboard kit involves a clear sequence of steps that even beginners can follow with patience.
Step 1: Prepare All Components
Ensure compatibility between PCB layout, switches, and stabilizers before starting.
Step 2: Install Stabilizers
Stabilizers are placed on larger keys like spacebar and Enter to improve stability and reduce rattling.
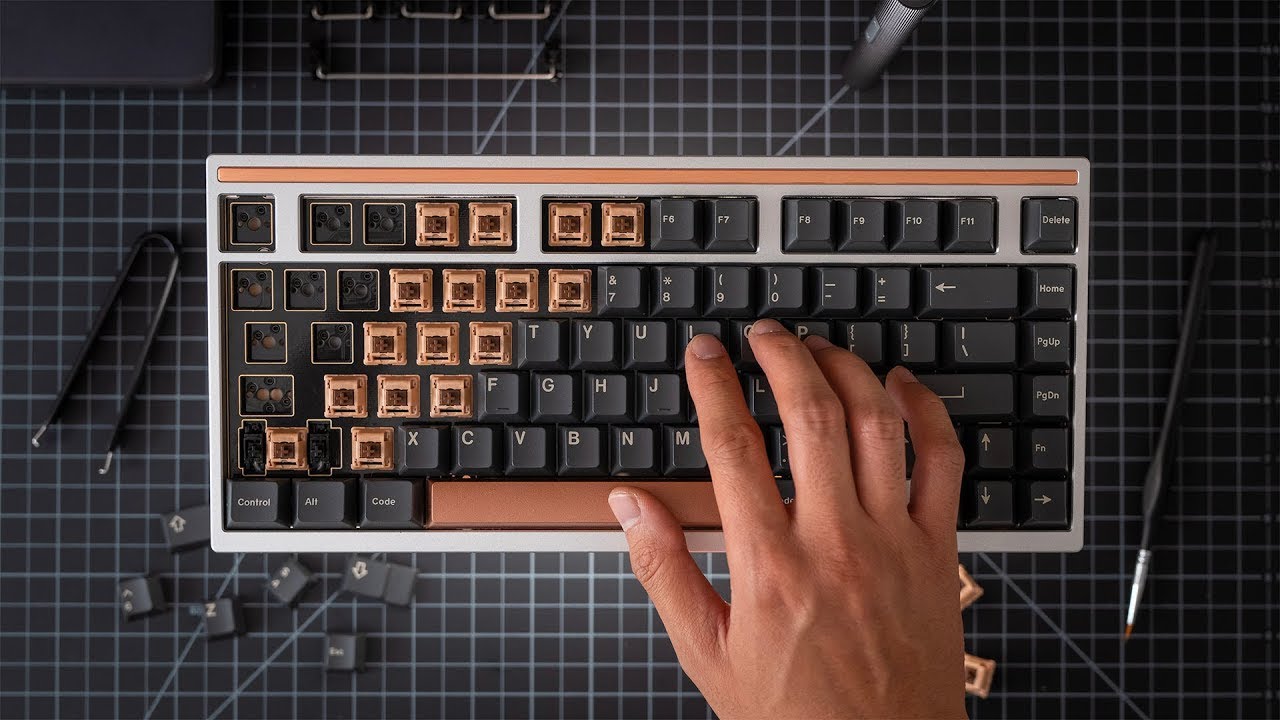
Step 3: Insert Switches
In hot-swap kits, switches are simply pressed into sockets. Soldered boards require manual soldering.
Step 4: Assemble PCB and Plate into Case
Secure the internal structure inside the keyboard housing.
Step 5: Install Keycaps
Match keycaps to the correct layout (ANSI or ISO) and press them onto switches.
Step 6: Test and Adjust
Use keyboard testing tools to verify all keys function correctly and make fine adjustments if needed.
Most beginners complete their first build in about 1–3 hours, with faster assembly times after gaining experience.
Types of Mechanical Keyboard Kits
Different keyboard kits are designed for different levels of experience and use cases.
| Type | Description | Best For |
| Hot-swap kits | No soldering required | Beginners and hobby users |
| Soldered kits | Permanent switch mounting | Advanced builders |
| 60% kits | Ultra-compact layout | Portability and gaming |
| TKL (80%) kits | No numpad design | Balanced work and gaming |
| Full-size kits | Complete layout with numpad | Office and data entry tasks |
Each format offers different trade-offs in portability, functionality, and desk space efficiency.
How to Choose the Right Mechanical Keyboard Kit
Selecting the right kit depends on your workflow, preferences, and budget.
For Gaming
Gamers typically prefer:
Linear switches for fast actuation
Compact layouts like 60% or TKL
Low-latency response and lightweight key feel
For Office and Productivity
Office users often benefit from:
Tactile switches for typing feedback
Quieter acoustic profiles
TKL or full-size layouts for efficiency
For Programming and Development
Developers usually prioritize
Full-size or TKL layouts for shortcut access
Reliable key response for long typing sessions
Balanced switch resistance for accuracy
Budget Considerations
Mechanical keyboard kits vary widely in price:
Entry-level kits: around $80–$150
Mid-range builds: $150–$300
Premium custom kits: $300+ depending on materials and features
Higher-end kits often include aluminum cases, gasket mounts, and improved acoustic engineering.
Conclusion
A mechanical keyboard kit provides a powerful way to create a fully customized typing experience tailored to individual needs. Whether your focus is gaming performance, professional productivity, or hobby-level customization, building your own keyboard offers long-term flexibility and satisfaction.
With the growing availability of hot-swap PCBs and modular components, keyboard building has become more accessible than ever—even for beginners.
FAQs
Is a mechanical keyboard kit better than a prebuilt keyboard?
Not necessarily. Kits offer more customization and upgrade potential, while prebuilt keyboards provide convenience and immediate usability.
Do I need soldering skills for a mechanical keyboard kit?
Not always. Many modern kits use hot-swap PCBs, which allow switches to be installed without soldering.
How much does a mechanical keyboard kit cost?
Prices vary widely. Basic kits start under $100, while premium builds with advanced materials can exceed $300.